In this post, we will explain how to install and run FreePBX (GPL), a Web-based GUI to control and manage Asterisk PBX, and control incoming phone calls using Java and the Asterisk FastAGI with a custom IVR. We will explain how to configure the system to run with its basic features. For further management, read FreePBX user manuals. First, let’s install FreePBX.
Installing FreeBPX
- Download the official release image from http://schmoozecom.com/distro-download.php
- Install the ISO on a PC or a Virtual Machine.
- After installing FreePBX, access the GUI using a WebBrowser. Access the IP address of the PC hosting the FreePBX.
- Set your main username and password.
- Select FreeBPX Administration to start managing your Asterisk PBX.
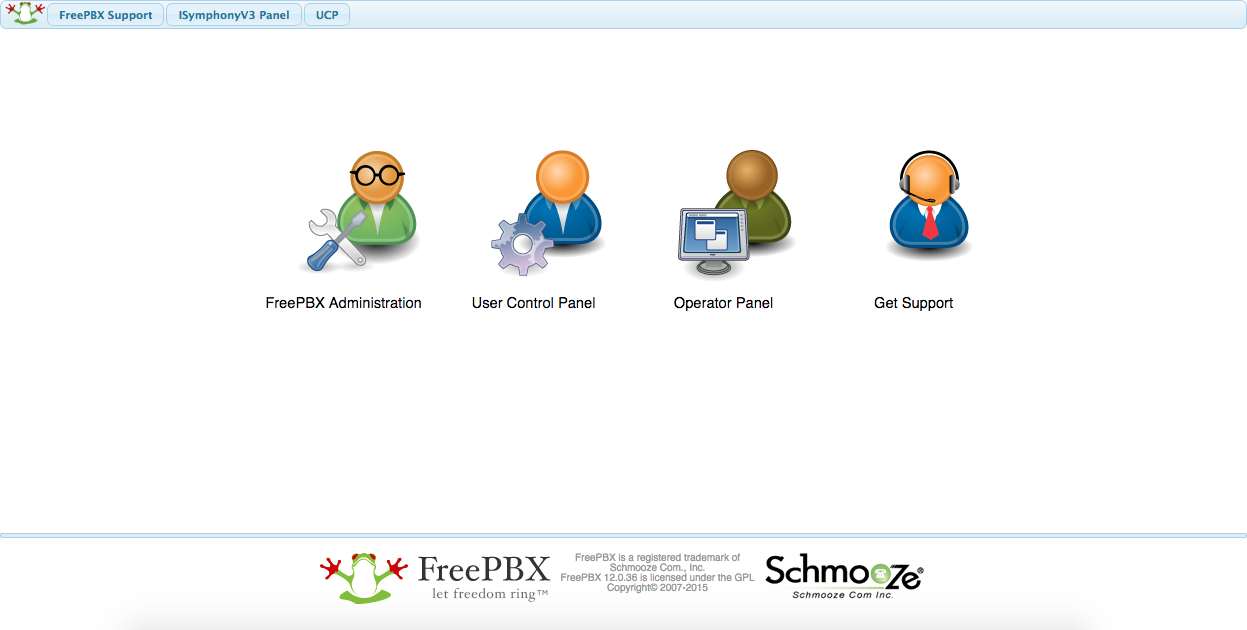
Congratulations! You have now Asterisk PBX up and running.
In order to receive incoming calls you should configure your SIP trunk into Asterisk:
Connect Asterisk to SIP Trunk
- Go to Connectivity – Trunks. In our example, select Add SIP (chain_sip) Trunk.
- Configure your SIP parameters. It is usual of SIP Trunks to provide every parameter needed to configure it in Asterisk. After configuring the SIP Trunk, go to Connectivity-Inbound Routes to create rules for incoming calls. In the Inbound Routes add a Route specifying at least your DID Number from the SIP Trunk. Set a destination for the incoming calls from the DID number. For example, select Phonebook Directory to ask the caller for a phonebook number.

- Save and apply changes.
Test your Asterisk calling from your phone to your SIP number. You should listen to a machine asking for a phonebook number.
Program de IVR
To control the incoming call using custom programming, you should use the Asterisk FastAGI. In our case, we will create an AGI script using Java and Asterisk-Java library:
- Download the Asterisk-Java library from http://www.asterisk-java.org/development/ from its SVN repository as follows:
- Access the asterisk-java folder where you downloaded the project and install the JAR file in your local Maven repository:
- Get the JAR file named asterisk-java.jar built and copy it to your test folder where you will place your AGI script. Write a JAVA file called HelloIVRScript.java where you will write your IVR steps. For example, write the following example into the JAVA file:
- Note: You can use many default sounds, located in folder
- or you can record files on your own to use it. Compile your Java file:
- In the same folder, create a file named:
fastagi-mapping.properties and place the following line inside the file:
- This means that when a phone call arrives at extension 1000 in your Asterisk, the hello.agi script will be invoked.
- Go to Admin – Custom Destinations and create a new Custom Destination with the following information:
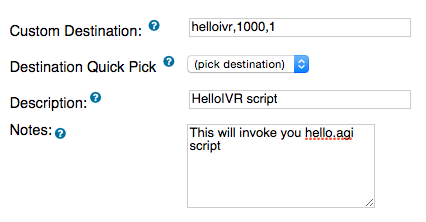
- Save and go to Connectivity – Inbound Routes as previously done.
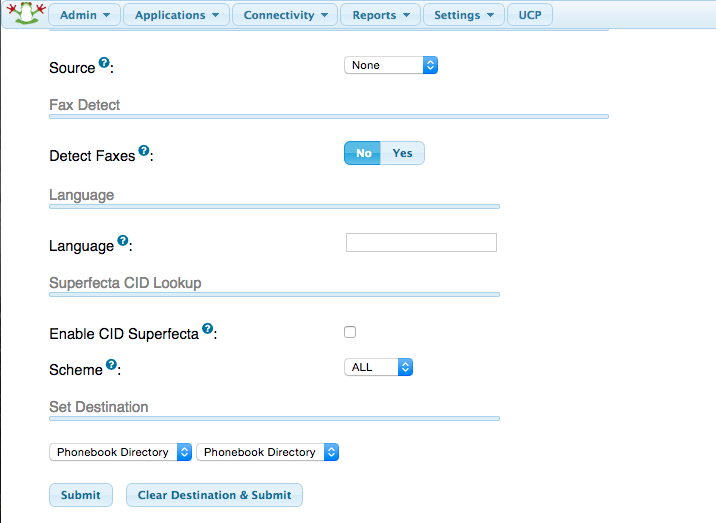
- Select the Inbound Route you previously created and in the Set Destination section, set the following configuration:

Save and apply changes.
- Test your IVR calling your SIP number again, and introducing numbers 2001 to enter two additional numbers or 1001 to leave a voice message. In case you leave a voice message, it will be stored in your “/var/lib/asterisk/sounds” folder in a file named voiceRecord.wav.